Suede sneakers look best when they have a little texture, depth, and movement in the material. That is also what makes them unforgiving. Learn how to clean suede sneakers the wrong way, and a quick wipe can leave a water ring, a flat patch, or a color change that is harder to fix than the original stain. The goal is not to scrub them until they look brand-new. It is to lift dirt while keeping the nap intact.
Before You Clean Suede Sneakers, Keep Them Dry
The biggest mistake is treating suede like smooth leather or canvas. Suede is made from the underside of leather, then buffed to create its soft, brushed finish. Water can darken it unevenly, while heat can stiffen it. Aggressive cleaning can press down the fibers and create shiny spots.
Start with the sneakers completely dry. If you just got caught in rain or stepped through wet pavement, stuff the shoes loosely with plain white paper and let them air-dry at room temperature. Do not put them on a radiator, use a hair dryer, or leave them in direct sun. Fast heat may feel efficient, but it can warp the shape and make the suede feel rough.
Remove the laces before doing anything else. It gives you access to the tongue and eyestay, and it stops dirty lace tips from dragging across the upper. If the insoles smell or need attention, take those out too. They can be cleaned separately with mild soap and water, but keep that moisture away from the suede upper.
What You Need for Cleaning Suede Sneakers
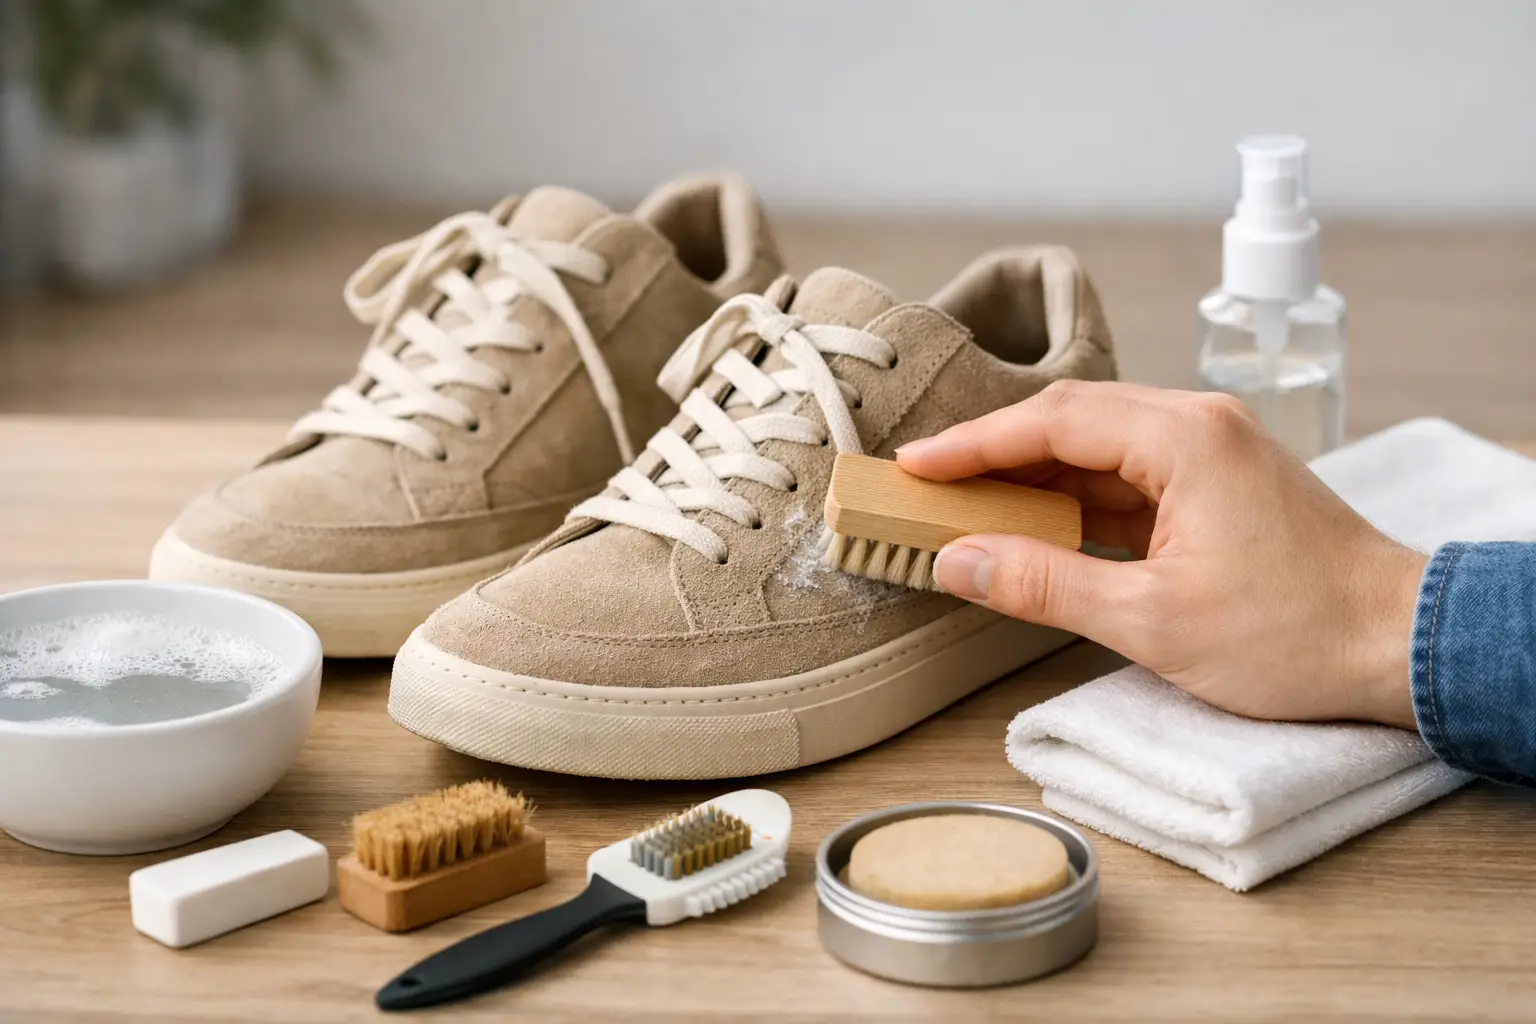
A dedicated suede brush and a suede eraser are the core tools. A brush with soft brass bristles is useful for restoring the nap, though a nylon-bristle brush is the safer choice if you are new to suede care or working on a lighter, more delicate pair. A clean microfiber cloth, white pencil eraser, and small amount of white vinegar can handle most home-cleaning jobs.
Use white or neutral materials wherever possible. Colored cloths and dyed towels can transfer pigment when damp. Skip household shortcuts such as dish soap, sneaker foam, baby wipes, and laundry detergent unless the product specifically says it is suitable for suede. A cleaner that works perfectly on leather panels can leave a visible edge on a hairy suede toe box.
For high-value pairs, uncommon colors, or shoes with multiple materials, test any cleaning product on a hidden section first. The inside edge of the tongue is usually a better test area than the toe or lateral side. One small test can save a pair you waited months to wear.
Step-by-Step: How to Clean Suede Sneakers
Brush away loose dirt first
Hold the shoe with the toe facing away from you and brush gently in one direction. You are trying to remove surface dust and loosen dried soil, not grind it deeper into the fibers. Work across the upper in light passes, paying extra attention to the mudguard, toe box, heel, and the crease lines where dust builds up.
Once the loose dirt is gone, brush back and forth lightly to revive the texture. Do not keep attacking one dark area with the brush. If the mark does not lift after a few passes, it is probably a stain rather than dry dirt, and it needs a different approach.
Use a suede eraser on scuffs and set-in marks
For a dry scuff, use a suede eraser with short, controlled strokes. A clean white pencil eraser can work in a pinch, but a proper suede eraser is less likely to leave residue. Rub only the affected spot, then brush away the crumbs.
This works particularly well on dusty toe scuffs from concrete, light marks on heel counters, and everyday grime around the edges. It is less effective on grease, salt, or a stain that has soaked deep into the material. If you find yourself pressing hard enough to strain your hand, stop. More force usually means more damage.
Treat water marks with an even hand
Water marks are frustrating because the temptation is to wet only the dark outline. That often creates a new ring. Instead, lightly dampen the entire suede panel with a clean microfiber cloth. The cloth should be barely moist, not dripping.
Blot the panel evenly, then stuff the shoe with white paper to hold its shape as it dries. Let it air-dry naturally. Once dry, brush the suede gently to raise the nap. This method is not instant, and it may take a second pass, but it gives the color the best chance to dry evenly.
Lift salt stains with white vinegar
Winter streets and sneaker rotations are not always a clean combination. Salt stains usually appear as pale, chalky edges after the shoe dries. Mix equal parts white vinegar and water, then dip a cotton cloth into the solution and wring it out thoroughly.
Dab the salt-marked area rather than rubbing it. Work outward softly to avoid leaving a hard cleaning boundary. Afterward, use a second cloth lightly dampened with plain water to remove any vinegar residue, then let the sneaker dry at room temperature. Brush the suede only after it is fully dry.
Deal with oil or grease without adding liquid
Oil is the stain that changes the plan. Do not reach for water, vinegar, or a cleaning solution. Cover the spot with cornstarch or talcum powder and let it sit overnight. The powder draws oil up from the suede rather than spreading it around.
Brush the powder off the next day and assess the spot in natural light. Repeat once or twice if necessary. A fresh oil stain responds better than one that has been sitting for weeks, so act early. If the mark is still visible after repeated attempts, a professional suede cleaner is the safer call, especially on a rare pair.
Clean the Sole Without Splashing the Upper
Rubber midsoles and outsoles can take more cleaning than suede, but keep your work controlled. Use a small brush or microfiber cloth with a little warm water and mild soap, working below the suede line. Wipe away soap residue with a separate damp cloth.
The key is preventing dirty foam from reaching the upper. On pairs with light suede and white midsoles, it helps to clean the sole first, let it dry, then handle the suede. That order keeps gray sole grime from migrating onto the material you are trying to preserve.
Bring Back the Texture After Cleaning
A suede sneaker can be clean and still look tired if the nap is flattened. Once the shoe is completely dry, brush it gently in alternating directions. This brings back the soft, textured finish that makes suede pairs look rich rather than worn out.
For a stubborn flattened area, such as a toe crease, hold the shoe near steam from a kettle for a few seconds, keeping the suede well away from the water and steam outlet. Then brush the area while it is slightly relaxed. This is a careful, occasional fix, not a weekly ritual. Too much moisture creates the same problems you were trying to avoid.
Keep Suede Sneakers Cleaner Between Wears
Suede rewards a little maintenance. Brush off dust after a few wears instead of waiting until the shoe looks dirty. Let pairs dry out for a day after wearing them in wet conditions, and use shoe trees or plain white paper to maintain the toe shape.
A suede-safe protector spray is worth using before the first wear and again after a deep clean, provided the shoes are fully dry. It will not make suede waterproof, and it will not protect against every oil drop or muddy curb. What it does is buy you time to blot spills before they settle in.
Storage matters, too. Keep suede sneakers away from direct sunlight and avoid sealing them in plastic for long periods. A cool, dry shelf or their original box with tissue paper works well. If you collect multiple suede pairs, rotate them. Repeated wear in bad weather is tougher on suede than almost any cleaning method.
A few marks are part of wearing sneakers, especially pairs built for the street rather than a display case. Clean suede carefully, protect it early, and let a well-worn pair keep some character without letting neglect take over.